Application forms enable you to create a structured process for your community members. These can be used for joining the platform itself, by replacing the standard registration link, or for members already part of your community.
Creating an Application Form
To create an application form, navigate to the 'Application Forms' tab on the left side of your platform. You’ll first land on the “Applicants” view. To begin creating a form, select the ‘Application Forms’ tab (next to Applicants) and then click the ‘Add Form’ button in the top right corner.
We’ll start by explaining how to create a form, then cover the various columns in the overview for clarity.
Form Setup and Configuration
Once you click 'Add Form,' you'll be directed to a settings page where you can add various information regarding your form, and set it up accordingly. First things to set up are:
- “Restrict by Programs” field: Choose which programs can complete the form/to which program the applicant should be added (if it is externally hosted).
- “Displays On” field:
- Dashboard Display: Select “Dashboard” to display the form as a pop-up on the main dashboard for registered users. In the "Restricted to Profiles" field, control which roles will see the form on the dashboard. If submitting the form will change the applicant's role (e.g., from Mentee to Mentor), configure the "Destination Profile Role(s)" accordingly. If no role change is needed, select the same role in both fields.
-
- Externally Hosted Display: Choose this option to generate an external link, which can replace the standard registration link. This is ideal if you want to collect additional information before granting platform access, such as asking, "Why would you like to join our community?" For externally hosted forms, role change processes are irrelevant, so set the same role in both “Restricted to Profiles” and “Destination Profile Roles.” It is a common practice to include this external link on your website.
Once you've set your display preferences, customize your form with images, a description, and complete the following fields:
Submission Processing Options
- Auto-approve and change role upon submission: Submissions will be automatically approved, and roles will change if configured.
- Change role of responder on review: The admin must manually approve or decline submissions before any role changes occur.
Communication Settings
Adjust the email messages applicants will receive depending on the action taken (e.g., approval or rejection).
Additional Settings
- Button Text: Customize the button text at the end of the form.
- On Submission Redirect: Direct users to a relevant resource on the platform (e.g., Onboarding Guide or Company Policy) or an external link after form submission.
- Can Submissions be Edited by Submitter?: Allow users to edit their answers anytime by enabling this option. They can do this through their Profile -> Edit -> Submissions page.
- Disable Dashboard Popup: Use this if you want the application form to appear in the users' to-do list on the dashboard without showing as a pop-up.
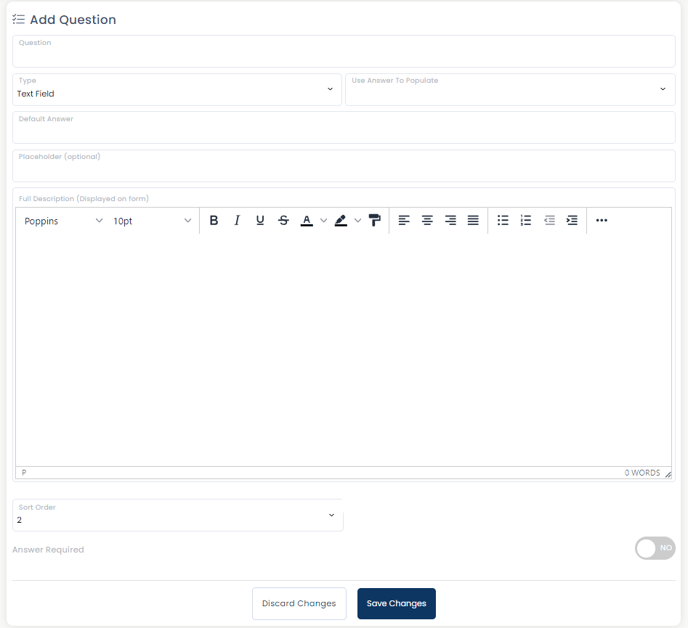
After saving these changes, you'll be taken to the “Add Question” page.
Adding Questions
Here, you can add your questions and select the type of response (checkboxes, file upload, date picker, etc.). You can also map the answers to specific fields in a user’s profile. At the bottom of the page, decide whether each question is mandatory. Once you've saved the form, you can preview it by clicking the “Preview Form” button at the top right.
Note: For externally hosted forms, the preview won’t display default questions like name, surname, and email, as these are required for platform registration and automatically included.
Reviewing Applicants and Managing Submissions
Return to the "Applicants" tab to view and manage submissions. Click on the applicant's name or profile picture to see their application details, or use the options to remove the application or applicant's profile.
Managing Application Forms Overview
Two key things to note in the “Application Forms” overview:
- Invites Column: Here, you can copy the link generated by the externally hosted form option. Use this link in marketing emails or on your website.
- Three-Dot Menu: From this menu, you can edit the form, view submissions, display a QR code, preview, duplicate, or delete the form.
Additional Features and Tips
- Profile Information Mapping: If you want specific answers to populate fields in USer profiles or company information, use the "Use answer to populate" option when adding questions. For example, you can gather profile bio information or desired skills, which can be useful for mentoring programs.
By following these steps, you'll be able to effectively create, manage, and customize application forms for your community members.